Thursday, August 29, 2013

pretty little dress card


I saw this lay out called ‘Night on the town’ from Julie G and loved the image of the pretty dress. Unfortunately I don’t own such a stamp, but no panic because a while ago I saw this great tutorial from Jennibellie about making your own stamps using string and wanted to give this a try, this was the perfect opportunity. I drew the image on cardboard, glued string to it and sealed it with gel medium. According to the tutorial you best use the stamps with acrylic paint as ink doesn’t really work that well, but to my surprise it worked just fine. I think it has something to do with the type of string, I used kitchen string, this is fairly smooth.  

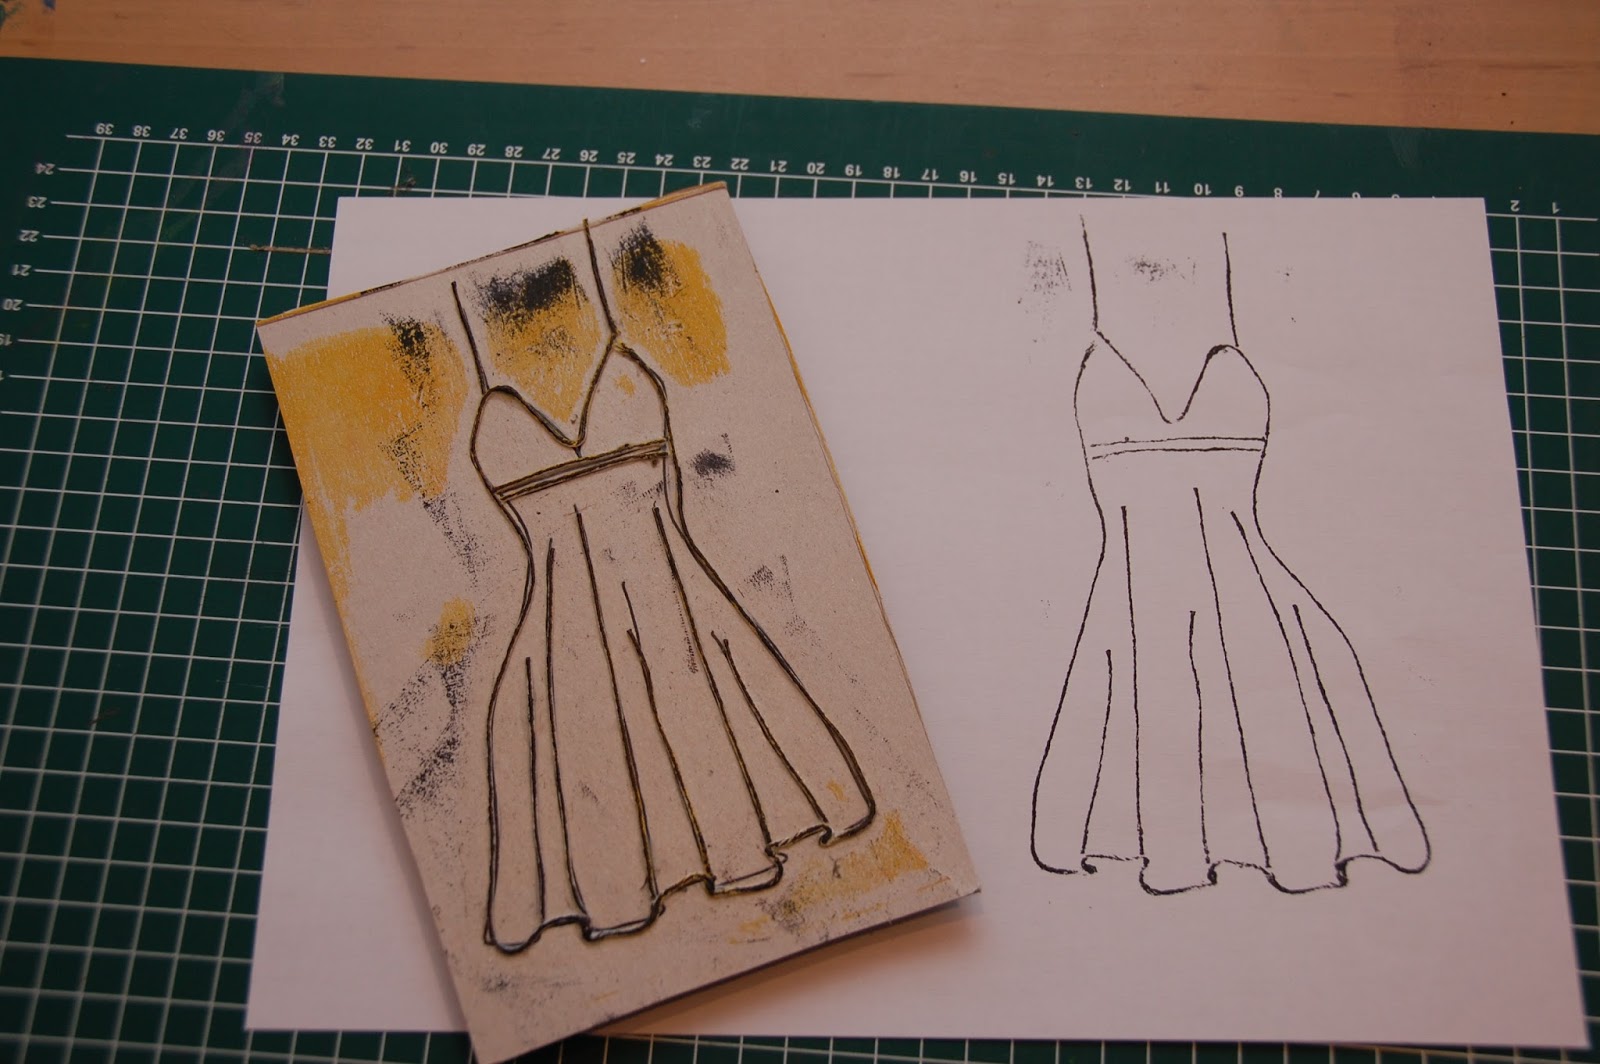
left the homemade stamp ( which has already yellow paint on it because I tried it out on the gelli plate :-))
right the stamped image using stazon
I stamped the dress on a gelli print, cut it out and glued it to another print. I also made this super cute little coat hanger. This makes the perfect birthday card for my husband’s grandmother tomorrow.


I also will be linking this post to August's gelli print party.

Bye for now, hope to see you soon back.


Monday, August 26, 2013

gelli fun

After watching Augusts’ gelli plate party over on Carolyne Dube’s blog I had to get some sticky back felt circles (the ones u use to protect the furniture) and have it ago myself, just had to, all you out there who have a gelli plate know what I mean.  This weekend I was able to fit in a couple of hours of play, joy!  I started out by making a texture plate:


I put the circles in a spiral. I then grabbed all my tools with circles (homemade stencils, cork, bubble wrap, masks, tubes):

And started playing!!!  I was having fun, but wasn’t all that excited about the results until I started layering mask on top of the backgrounds. I was over the moon with excitement about the results:


I love the birds so much that I'm thinking of getting a frame (a long rectangle for 3 pictures) and framing them. What do you think?
And on top of these I've got a couple of beautiful images to use in a future project:


 It won't be too long before I do some more prints, that's for sure, way too much fun!
Thanks for stopping bye and hope to see you soon back.


Sunday, August 25, 2013

Gelli print journal

For my first attempt in binding a book I found the perfect project on https://www.youtube.com/watch?v=p2foQmgenyg&feature=c4-overview-vl&list=PLc7cFqy5Btdmj6sUyR2UKxqzurbcsAuz9 ; a journal from gelli plate prints by Christy Sobolewski. Perfect to use up some of the prints that are rapidly piling up, because did I already mention that printing on a gelli plate is very addictive?! 

I took 12 prints, cut them to size and folded them in signatures (= a group of folded pages that nest, one inside the other). I didn’t put too much thought in the order of the pages, it’s rather random. So I have 3 signatures in my book, each containing 4 pages. The cover I made using a pizza box, the hinge is the original width of the box. The cover is decorated also using the gelli plate. 


After all that was done I could prepare to stitch the book together. I took 3 points evenly spaced on each signature and on the cover and punched holes in them. I do not own any bookmaking tools yet, so I made use of what I already have and in this case it was a needle for parchment. Also I don’t have special bookbinding thread, so I used regular black stitching thread.  I should have waxed the thread with beeswax but still need to run out and get some or order some online because where I live there aren’t really any good craft supplies stores. For the sewing I refer to the video.


As this was my first attempt in binding a book, it is not flawless (but heay, that’s part of the sharm some might say). The pages weren’t cut perfectly, the sewing is a bit loose and I managed to put the journal together the wrong way around, so normally I planned that the flap on the cover would go from back to front but now it is the other way around. Maybe I’ll keep it or maybe I just cut it off (because also it’s not that sturdy and I think it might tear). Funny enough Christy encountered also a problem with the order of her book in her video.

I plan to use this journal to practice my doodling, can anyone recommend a good book about doodling?

I also will be linking this post to August's colorful gelli print party from Carolyn Dube.

Thursday, August 22, 2013

art journaling

I came across art journaling not so long ago by browsing through You Tube tutorials and found the concept fascinating. 
For those who don’ t know what an art journal is, it is a journal in which you combine art and words to express yourself. I always find the word ‘art’ so loaded and don’t consider myself being an artist ( I associate an artist with someone who can paint and draw),  but rather someone who loves being creative and get messy in the process and just have fun and relax. So instead of drawing I stencil, stamp, collage…
The nice thing about journaling is, there is no wrong or right way, it’s your way, there are NO rules.

I use journaling not so much as a daily diary but rather to experiment with new techniques and  enjoy the process of creating. 
Here are some examples from my art journal:


Wednesday, August 21, 2013

Marble art

Today’s art moment  was a bit less messy then yesterday.
We took a shoebox (containment of mess), placed a piece of white paper in it, dripped some paint on the paper and  dropped some marbles in, then replaced the lid back on and shake away. 
Lots of fun and stunning results, see for yourself:


Suddenly my son had the idea to make a monoprint of his design, I was impressed with the fact that he came up with the idea all by himself and also with the results:


 I definitely need to run to the shop to get some frames, these deserve a place on the wall!!!


Tuesday, August 20, 2013

Spitter Spatter fun with paint

Today me and my son (who’s 3,5 years old and loves doing crafts, especially painting and getting messy) took our paints outside for some spitter spatter fun. I saw this fabulous idea on http://www.puttisworld.com/2011/04/super-fun-splat-art.html#  just the other day and immediately knew I had to try this. 
While I was pouring paints in plastic containers and diluting them with some water, my son cut some foam  (I was going to use sponges but then saw the leftover  foam of a cushion project and thought this would be a perfect way to use it up).


Just dip the foam in paint, place them on a piece of  paper (we used black cardstock) and smash away with a spatula and see the excitement on their face.


As usually he was on a roll, luckily we were outside and I didn’t have to worry too much about the mess.
he started by pooring paint on paper and walking through it.


and to end the fun he made hand impressions, because what is more fun than covering your hands completely with paint?!?


Oh yeah, I had a "spatter" accident today, a bottle of paint fell out of my hands and fell on the floor where of coarse the lid broke and paint spattered everywhere, including all over me.lol.


Thursday, August 15, 2013

Treasure hunt

Today is a holiday in Belgium and each year there is a huge jumble sale in a neighboring town.
This time I found some real treasures, I’m over the moon with excitement!
First of all I found a typewriter, so retro.


And I also found this wooden cabinet 


which I will be using for my 12x12 papers and which I'm going to jazz up. I couldn’t figure out what it originally was used for, so this friendly lady told me it was used back in the time when the bakers still delivered at home, and they used it to transport cakes in it. Isn’t this fascinating.

Wednesday, August 14, 2013

Birthday calendar month Augustus


I didn't want a store bought birthday calendar, instead I started making my own original "artsy" calendar.
For the mont of august I was inspired by summer, so I used vibrant colors and flowers.


I started by spraying a 12x12 piece of white paper with water and Dylusions sprayink and dabbed it dry with kitchen towel. I then used a stencil and sprayed some more water; let it sit for a moment and dabbed it dry, this created a bleach effect.(technique by Dyan Reaveley)


The flowers were made using gelli prints. If you own a gelli plate you will already know that the stack of prints pile up quite rapidly. It is so addictive! This definitely was a good investment.
I just cut out the petals and glued them on the background and used a button for the centre.

Now I just have to punch a hole in the left top corner and hang it on the wall using a metal ring.
Next month I will reveil Septembers design.

Hope you enjoyed my first 'real' post and wish to see you back soon.
Bye for now.

I will be linking this post to August's colorful gelli print party from the very talented Carolyn Dube.


Saturday, August 10, 2013

and then there was a blog

Hi there,

Scared and excited, I think that is the best description of how I'm feeling right now.
My first ever blog is a fact!
I've been thinking about starting one for a while now, but as often a little overwhelmed with the new and unknown I was postponing it and wondering whether I should do it. 
But tonight I thought why not, just do it!
And voila, here it is.
I still have to figure out how everything works, so forgive me if it is a bit messy.
Thanks for stopping by and hope to see you back soon.